
How to Grow, Harvest and Cure Tobacco

In his 1954 work, "The Gentle Art of Smoking", Alfred H. Dunhill was nostalgic for a past when smoking was an "art" and enjoyed as a pleasurable pastime in elegant smoking rooms. He remarked that the "furious tempo of modern life" had resulted in tobacco, in the form of ubiquitous cigarettes, being used as a narcotic to calm frayed nerves and becoming a habit and therefore no longer pleasurable. Common sense dictates that anything you do to your body in excess (a habit) is detrimental.
[ FAQ ] [ Glossary ] [ Click Here to Buy Tobacco Seed ]
We originally started growing and offering tobacco seeds as ornamental annuals. They are a quite magnificent plant with beautiful flowers making them a great selection for the back of flower beds. All of the seed varieties available here have interesting histories, were grown in different geographical locations, and cultivated for varied and different final uses. All grew well for us in Oregon and in Texas.
Pictorial of a Growing Cycle
It starts with incredibly tiny seeds, which are sprinkled onto the surface of a moist and sterile seed starting mix. Tobacco needs light to germinate, so these seeds must not be covered. They also must never be allowed to dry out, so they are frequently (but gently) watered using a mist from a spray bottle.
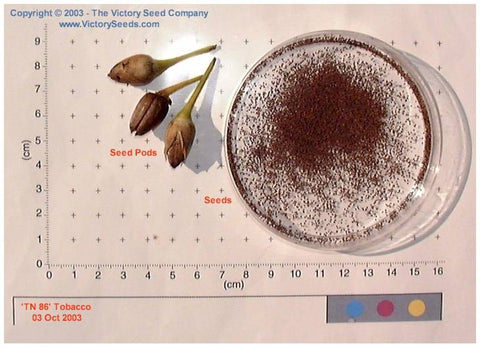
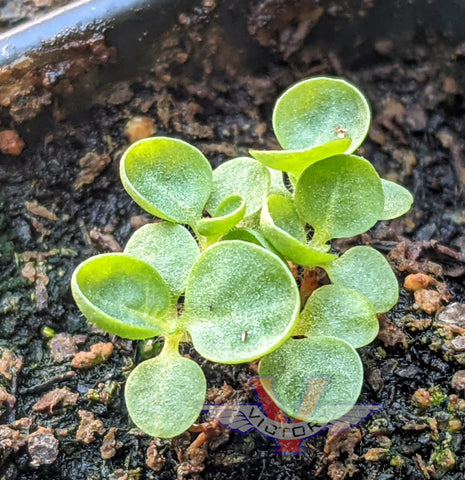
Tiny seedlings emerge in about 10 days. My method is to start them in a small petri dish with fine sterile seed starting mix, nicely watered and kept very moist, with the lid on which helps hold the moisture in. Once I prepare the soil and wet it, I then very lightly sprinkle the seeds evenly over the surface and then replace the clear lid. Since the seeds need light to germinate, they are not covered in soil, and the dish is set under a growlight.
I check them daily, and as soon as I see the seeds sprout, I carefully lift the sprouted seedling along with its surrounding soil and place it into a seedling tray with similarly prepared clean potting soil, free of any debris, and pre-watered.
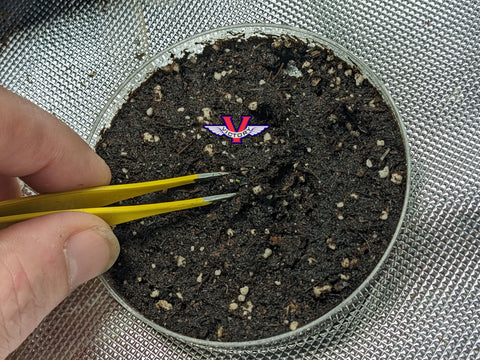
In order to make sure the seedling gets good contact, I very gently water it in.

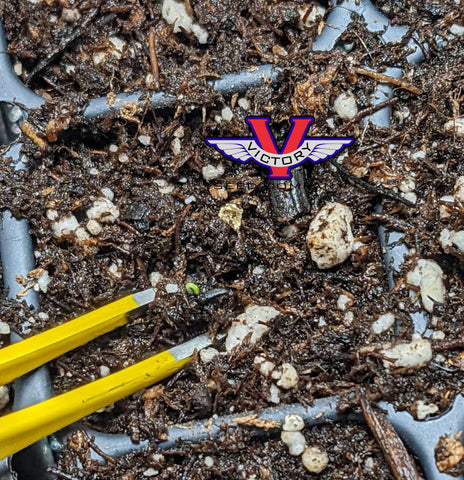
The photo below shows some seedlings that were placed into their trays two days previously:
While the seedlings are small, it is critically important to never let them dry out. They will die immediately if they get dry. Once they get a few inches tall, you can start to treat them like a normal plant, watering normally and in fact being careful not to overwater them.
Fertilizer:
It is worth mentioning at this point that you need to lightly fertilize your tobacco seedlings. I use a weak half-strength water soluble fertilizer like Miracle-Gro. You want a little bit of boron (which most fertilizers have) to help them get started, but too much boron becomes toxic, so keep the fertilizer very weak.
Prevent damping off!
Tobacco seedlings seem to be the most susceptible to damping off of anything I've ever grown. Damping off is caused by a fungus that thrives in damp environments. I find that by keeping a fan gently blowing over my seedlings, that is enough to prevent the damping off.
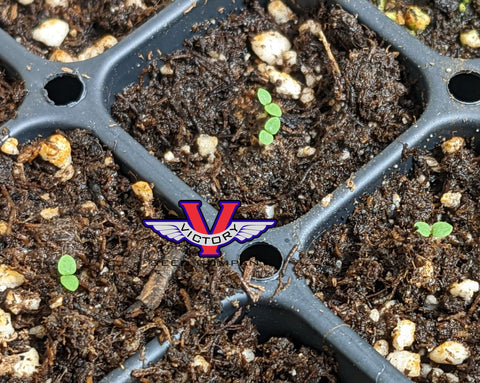
Below you can see seedlings about 2 weeks after sprouting.
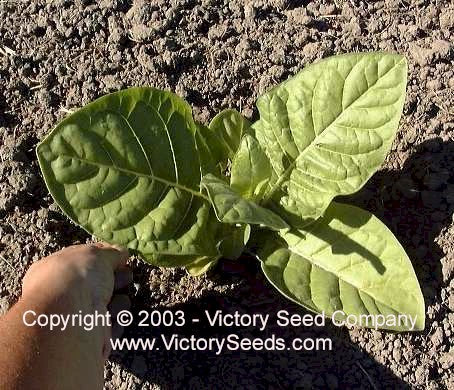
Once they are 4 to 6 inches tall you can put them out in the ground and grow them approximately like you might peppers and tomatoes. Avoid cold weather, and certainly don't let them get frosted on.
Below shows what the plants should look like in early summer.
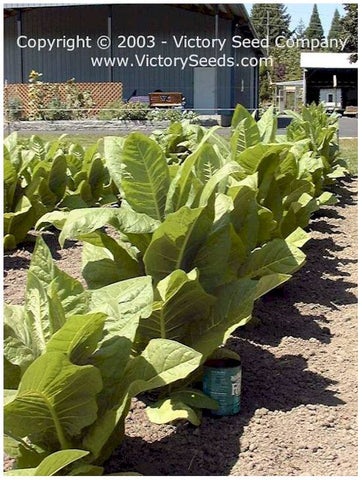
Mid to late summer, about a month behind the optimum stage:
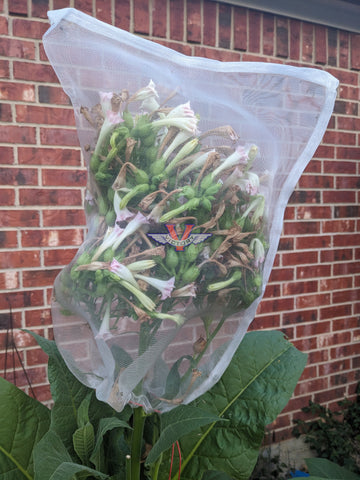
Flower heads are bagged for seed production. They are covered before the flowers open in order to maintain purity of the variety. For production of leaf, however, the plants are topped and later suckered as required.
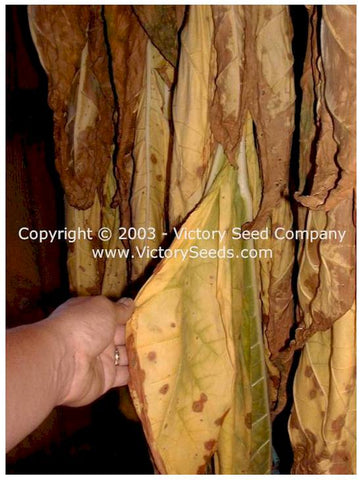
Early September. Note the plants are beginning to ripen (yellow). This is intended and desired for proper curing. There are some "dark leaf" varieties that cure from green to brown but TN86 cures from green to yellow to brown.

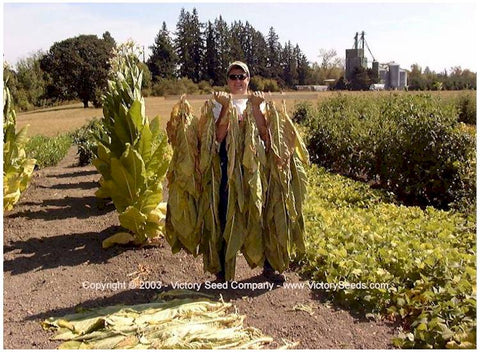
Cut, wilted, and ready to stick. That is, using a tobacco spear on the end of a "tobacco stick" that has been driven into the ground, the stalks are pierces and threaded onto the stick. The sticks are then gathered and moved to the tobacco barns.
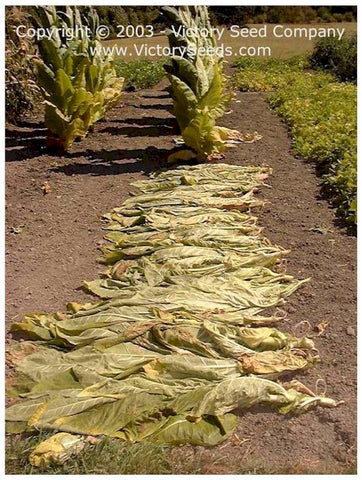
For small scale, personal use growing, tying twine onto the stalk works just fine. Here is a stick ready for the barn. Other areas out of inclement weather and direct sunlight will work fine as well. For example, the rafters of a carport or garage.
Air curing in the barn. The warm days and cool nights of early fall are perfect conditions for curing tobacco leaf.
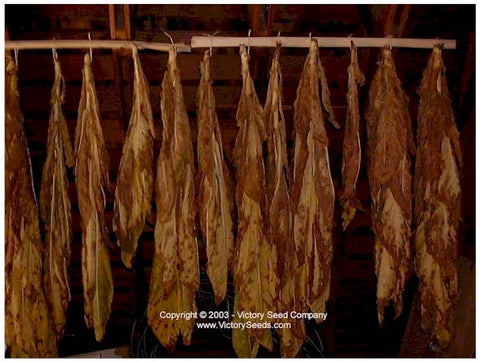
At one week, yellow colors begin to change to varying shades of brown.
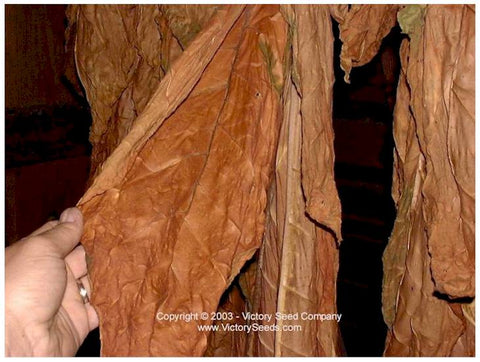
At eight weeks the air curing process is nearly complete.
Tobacco Spear
(aka Spud)
Courtesy David Pendergrass

After the tobacco has cured for a period from several months to several years, it is then fermented and processed in many different ways. Most of these methods are proprietary and highly guarded secrets of the cigar masters. These processes are the reason why various tobacco products have such distinct aromas and flavors.
Informative informational links are found by clicking here.