
How to save tomato seeds
By Dave Whitinger
Updated June 9th, 2023
Introduction
You have probably noticed that tomato seeds straight out of the fruit have a slippery slimy gel coating around them. What is this coating, and why is it there? It's primary purpose is to act as a germination inhibitor. The gel prevents water from passing into the seed, and this is why tomato seeds rarely germinate inside the fruit. But we want to remove that gel before we put the seeds into storage, so that when it's time to sow them, the gel is gone and water can more readily penetrate into the seed (thus provoking germination).
Luckily, nature itself has a way to remove the gel. If a tomato ripens and falls to the ground, you will see it start to rot. It'll ferment and develop a particular smell, and the seeds will lose their gel coat. Eventually it all dries up and the seeds soon germinate. This is the process that we replicate inside our kitchens when we ferment tomato seeds.
Fermentation
The end goal of fermentation is to produce clean, dry, viable seeds. It's important to start with the highest quality fruits you can find, and of course they should be as fully ripened as possible.
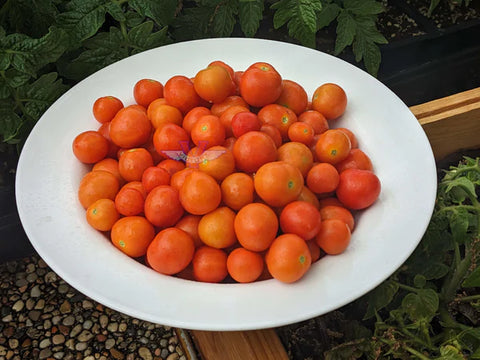
The first step in processing them is to remove all the seeds as well as the juice, while leaving as much of the pulp and skin behind as possible. You can accomplish this through numerous ways. Some people cut each fruit in half and squeeze the seeds/juice into a jar.
My preferred way is to crush them all in a large stainless steel bowl. Once every single fruit is crushed, I have a big slurry of seeds, juice, pulp and skins.

I then pour this into a large colander and my wooded crusher I twist and push it around until all the seeds have gone through holes and only the pulp and skins remain. It took a lot of trial and error to figure out the best way, and I had to get a specific colander with large enough holes to make the seeds go through.
This is a multi-step process. The first pass has about 80% of the seeds come through, but some of the seed stubbornly remain behind. For those, I get a second bowl, put the colander in it, and then use water to fill it up. With all the water present, I then stir and the good seeds sink down through the holes into the water below. I then lift the colander, leaving the seeds in the water, the pour off the water and I have only seeds. These seeds then get added back into the other 80% of their friends who got in to the bowl in the first pass.

Pour the seeds into a jar. I use widemouth quart size canning jars most of the time, but if you have a large amount of seed, you may need to use a 1 gallon pickle jar, or even a 5 gallon bucket. It is imperative that you label the jar at this point! And, in fact, from this moment forward those seeds must have a label on their container 100% of the time.

Set the jar in a safe room-temperature place where pets can't get to it. I usually like to loosely cover the jar with plastic or a loose fitting lid. After 3 to 4 days, you will notice it getting moldy and smelly. This means that your waiting is almost done.

While you are waiting for it to get to this point, I like to thoroughly stir it a few times a day. When stirring, be careful not to use the same stick for different varieties unless you carefully wash it between jars. Reason being: little seeds can hitchhike from one jar to another and that would mix up varieties and ruin all your work.

Now after 3 or 4 days, the seeds are smelly and fermented, and it's time to clean them up. I like to transfer them into a larger container (usually going from a quart to a gallon jar). Then I top up the rest of the way with water.

You will notice the seeds will all sink to the bottom. Any that float are bad seeds.

Pour off most of the water and then fill it back up again with fresh water.

Notice again the seeds sink and the garbage floats. So pour and refill again.

With each "pour and refill" you will see the water becoming clearer and clearer.

After 3 to 5 pourings you will have nearly crystal clear water and beautiful clean seeds resting at the bottom of the water. Congratulations!

Take these seeds and put them on a plate. For me, I have a little sieve that I pour them through which makes it easier to get the water all gone. You can also just carefully pour the water out until only seeds are left, but I find this technique makes it difficult to remove the seeds themselves from the jar. It's easier to pour it through a sieve and you'll still have seeds in the jar, so put more water in and pour it through the sieve again.
Spread the seeds out on the plate as thinly as you can.

So now you have all your seeds spread out on a plate, and it's crucially important that you get these dried out immediately, otherwise they will start to sprout and your batch will be completely ruined. What I do is take them straight to my closet where I have a small 6" fan pointing at the plate. Set it down and turn the fan on, and within 24 hours they will be completely bone dry. Don't worry about them blowing around; as they dry they'll stick to the plate and they aren't going anywhere. You'll notice in the photo below that I don't have a label... I actually do, it's underneath the plate. Everyone has their own way, but I like to put my labels under the plate so they don't blow away. I'm careful to pick up the label along with the plate.

About 24 hours under the fan and the seeds are now dry, and like I said before, they are firmly "glued" to the plate. So I like to use a plastic card (like a credit card or a Six Flags membership card or something like that) to gently scrape them loose from the plate. I end up with clumps of seeds.

I take the clumps of seeds and put them on a large clean piece of linen. Then I pick up the linen and rub the seeds between the fabric. I also just use my fingers to rub the clumps, and I run my hands over them feeling for any other clumps. If the seeds were pretty clean (no skins or pulp during ferment) then this process actually pretty quickly and easily produces individual non-clumped seeds. Sometimes a seed or two are still stuck together and while we do try to avoid that, it's not the end of the world if it happens.

At this point, I usually put the seeds aside in a bowl (labeled!!) and leave it in a very dry place for several days. This gives it extra time to finish drying, in case that's necessary. When it is bone dry, you can package it into a bag, envelope or packet, and write the variety name, the year you harvested it, and a lot number (I use lot numbers like "DRW2023" which are my initials plus the year.)
You can also add a dessicant packet to the envelope if you have access to those. That's what we do with all our bulk envelopes and it helps give extra insurance against moisture.
So, how do you protect the genetic purity of the tomato you're growing?
Glad you asked! This is a crucially important matter, but luckily with tomatoes it's pretty easy. Your goal here is to prevent tomatoes from being crossed (by insects) with other varieties of tomatoes. Most tomatoes have simple "perfect" flowers (meaning it has both male and female organs). The shape of their flower means that insects can barely access those organs, even when the flower is fully open. With varieties like this, you can achieve purity by making sure that no other varieties are grown within 10 feet. That's easy to accomplish even in suburban backyards.
Some varieties, especially beefsteak kinds, or those with very large fruit, and occasionally potato leafed varieties, will have a different shaped flower. It will be much larger, much more showy, and the stigma will even be protruding out of the flower, presenting itself as a ready recipient for pollen from the wrong place! So when you have any varieties like that, you will need to take extra measures to protect them, which might mean isolating them by 250 feet from other varieties, or else cage the plants, or bag the flowers before they open with a tight mesh baggy to prevent insects from reaching them.
Alright, hopefully this is helpful! Class dismissed.